Scones

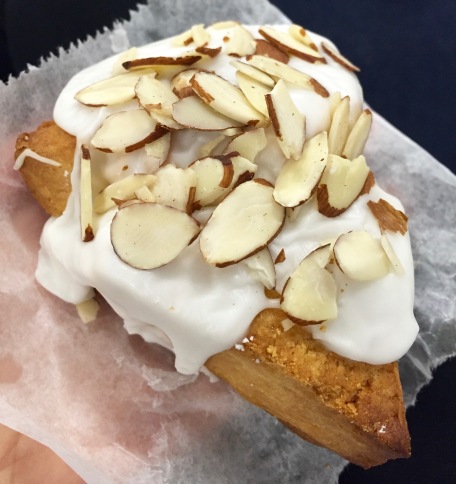
I love perfecting new recipes and starting from a really simple base recipe. That’s what I did with these scones. I took a generic scone recipe I found from an old 1980’s cookbook at the library and altered it to make it gluten free, dairy free, and delicious!

I have tried making scones several times, but I think the addition of applesauce to this batch really is what sealed the deal! My previous batches have come out dry and flaky, which while still tasty was just not the texture I wanted. It wasn’t until I started trying the applesauce that I found the right texture to my scones.

IMG_9073

Of course, in keeping with the cabinet clean out, I used dates and walnuts because that’s what I had on hand. However, feel free to use about a half cup of whatever mix ins you prefer! If you try something else, definitely comment below and let me know what you enjoyed! I think in my next round I want to try chocolate chips and orange or even lemon and dried apricots! I can’t wait to try them out!

Recipe:

1/4 cup almond milk (I used silk), + 1 tbsp lemon juice

2 cups gluten-free flour (I used Cup4Cup)

1 1/2 tbsp baking powder

1/2 tsp kosher salt

1 tsp pumpkin pie spice

1 tsp cinnamon

1/4 cup sugar

6 tbsps cold stick butter, chopped (I used earth balance vegan spread)

1/4 cup honey or agave nectar (I have used both on this recipe and they both work great!)

1/3 cup applesauce

optional:

1/2 cup chopped walnuts

8 large dates, chopped

1 tbsp turbinado sugar

Prep: Whisk together the almond milk and lemon juice and let sit for 5 minutes. Preheat oven to 375 degrees. Line a baking sheet with parchment paper and sprinkle a little bit of flour on the parchment paper.

Mix the flour, baking powder, kosher salt, pumpkin pie spice, cinnamon, and sugar in a large bowl. Add in the chopped butter and mix with a fork until combined. Add in the honey, applesauce, and milk mixture until doughy. Next, gently fold in the mix ins if desired. Feel free to experiment!

Spoon the dough out on to the parchment paper and pat the dough into a round pizza shape that is about 2 inches thick. Sprinkle with turbinado sugar if desired. With a floured sharp knife, slice the dough into 8 triangles, similar to what you would do with a pizza.

Spread out the triangles on the baking sheet and pop in the oven. Bake for about 15 minutes or until they are golden brown. Cool on the pan or wire rack to cool completely.

Biscottis

In cleaning out my cabinets in my apartment, I had half used bags of several different kinds of gluten free flours. I started thinking about what I could make and decided I wanted to attempt biscottis for the first time.

For some reason, I thought they would be super difficult to make, but they were surprisingly easy! While I decided to pull them out a little earlier so they wouldn’t be completely hard, they were the perfect addition to a nice cup of coffee!

IMG_9157

The recipe will make a standard biscotti or you can add in some delicious mix in’s! I had walnuts and dates on hand, so I just chopped those up and added them into the dough. Since there is no sugar in the recipe, the dates added a bit of sweetness that was perfect!’

IMG_9170 (1).jpg

Recipe:

1/2 cup oat flour

3/4 cup millet flour

3/4 cup almond flour

1/4 cup corn starch

1 tbsp baking powder

1/2 tsp kosher salt

2 tsps xanthan gum

1 tsp cinnamon

1 tbsp lemon juice with enough almond milk to fill up to 3/4 cup of liquid

4 tbsps honey

1 tbsp oil

2 tsp vanilla

optional:

1/2 cup chopped walnuts

8 dates finely chopped

Preheat the oven to 350 degrees. In a large mixing bowl, whisk together the dry ingredients. Add in the lemon and almond milk mixture, honey, oil and vanilla. Stir until combined. The dough will still feel very thick, which is exactly what you want.

Place the dough onto a lined or greased baking sheet. Shape the dough with your hands into a long loaf that is about an inch- 1 1/2 inch high, but no more than 2 inches. Once you have a shape, use a sharp knife to slice the dough horizontally to make each biscotti. For me it made about 20.

Using a large sharp knife, carefully but firmly slice across the dough horizontally to make 20 cookies.

Bake the sliced loaf for 15 minutes. Remove the pan from the oven, separate the slices, and lay each on its side. Bake the slices for 8 more minutes. Remove the pan from the oven, flip the slices over, and bake for another 8 minutes.

Remove from oven again once both sides are slightly golden and cool on a wire rack.


Road Trip Recap: Raleigh, NC

In an attempt to make a the long-ish drive from DC to Atlanta enjoyable, my mother thought we should do a stop over somewhere on our way. I had always heard that Raleigh was a great city for gluten free food and I have also always wanted to live in North Carolina. So stopping over in Raleigh for an extra day seemed like the perfect fit!

The first day we stopped at the Red Bowl Asian Bistro for dinner. They had a small but good selection of gluten free options for dinner. We split the chicken lettuce wraps which already came preportioned in crunchy romaine lettuce for an appetizer and then the pineapple chicken with brown rice for dinner. The pineapple chicken was great and I enjoyed the simple sauce that they had with the dish. They also had gluten free tamari soy sauce to use, but it definitely wasn’t needed with the entree!

The next morning we enjoyed a great hotel breakfast! The Hilton Midtown did an amazing job of having gluten free options. The chef at the buffet whipped up a delicious made to order omelet with tons of veggies and of course bacon. I put together a bowl of fruit, sprinkled it with some cinnamon and got a cup of coffee. It was a delicious and filling breakfast to enjoy after my long run around the area!

IMG_2655

We spent the rest of the morning at the State Farmer’s Market. We got to sample fresh fruits, veggies, cheeses, and salsas from local farms. I know I ate my fair share of strawberries, but they were too good to pass up!

Then we took a quick 30 minute drive out to Benson, NC to visit JP’s Pastry and pick up our order. Although many local businesses carry their products, we called in an order and they were kind enough to let us come pick up our assortment of pastries only a few hours later! We loaded up on gluten free goodies to last us through the next couple of days. While we were there, the owner was kind enough to come out and talk to us about how their bakery is certified gluten free, his training and history with baking, as well as their growth and availability in the Raleigh area. It was an incredible experience and fantastic customer service. I cannot wait to go back again. Definitely check out their facebook and instagram page so you can drool over all of their creations!

On our way back, we had to stop at a nearby park to eat the incredible funfetti cheesecake bars. We just couldn’t wait to try them and they definitely didn’t disappoint. They had the same flavor of funfetti cake that I always remember with a delicious crust!

IMG_9454

IMG_2674


While we were at JP’s Pastry, the owner Joe, suggested that we try out ORO Lounge and Restaurant for dinner since they just came out with their spring menu. My mom and I saw risotto on their menu and were sold! Although it was a tapas place where we should have ordered multiple plates and shared, we both were dying to try their fig and goat cheese risotto, so we each got our own bowl. It was so creamy and the figs added a pop of sweetness to a great dish.


While in Raleigh, we tried a few different coffee places. While most of them were nothing to write home about, that is not the case with Liquid State. This adorable coffee shop at the edge of the North Carolina State University campus had tons of creative options along with soy and almond milk as dairy free alternatives! The almond milk latte I got was perfect! It was nice and hot and didn’t need any sweetener. In case you needed any other reason to try it out, they even have gluten free treats from JP’s Pastry. It is definitely worth stopping by. You can walk around the campus while enjoying your coffee, or bring your laptop and catch up on e-mails in their cafe.

IMG_2675

Over the next several days we ate our amazing goodies from JP’s Pastry. We had the strawberry muffins, which were light, fluffy, and unlike any gluten free muffin I have had before. We had the almond scones a few days later and they were still packed with a great almond flavor and tasted fresh baked. The frosting to those really sealed the deal! They were both items that I would go back and get again.

IMG_9500

In the desserts section, we tried their oatmeal cream pie, blondie, and brownie! The oatmeal cream pie is a must! It was so moist that it fell apart while I was eating it. Seriously, so good! We saved the brownie and blondies for the following week and may have added some dairy free ice cream to them. I loved the blondie! It was amazing! The brownie was my mom’s favorite though. Honestly, my guess would be that you really can’t go wrong with anything from their bakery.

Overall, the trip to Raleigh lived up to its expectations. We enjoyed ourselves and ate great gluten free foods from beginning to end and even a few days later!

IMG_9515

At Home Coffee Frap

There are so many mornings when I want to splurge and go for that fancy coffee at Starbucks. But then reality kicks in that I have limited myself to one fancy coffee each week for the sake of my budget and the calories.

Last weekend I was having an easy morning at home and really wanted a frappuccino and decided to make a significantly lower calorie version than the one at Starbucks. It may not be as rich or as creamy but it definitely fit the bill of an iced coffee drink that is milky and slightly creamy!

IMG_8957.jpg

What healthy alternatives to you turn to in order to fight those high calorie cravings?

Recipe:

2 seedless dates

1 cup almond milk

1 tsp vanilla extract

2 tbsp instant coffee granules

6 ice cubes

1 spoonful of frozen dairy free cool whip (optional, but adds creaminess)

(optional) 1 tbsp cocoa powder

First put the almond milk, date, vanilla, and instant coffee into your blender cup and blend until smooth. Add in ice, frozen cool whip and cocoa powder if desired and blend.

If you like it a little creamier, try adding in 1/4-1/2 of a banana for that great creamy texture without the added sugar of whipped cream! 

Enjoy!

Refried Beans and Frozen Burritos

In an effort to clean out my pantry, I am still looking for ways to use this giant can of white beans. I looked to see what other ingredients I could pair with the beans to make a meal. I remembered the packages of corn tortillas I had in the freezer as well as the costco sized salsa containers and started thinking of bean and cheese burritos.

I knew that making the dried beans takes a while- lesson learned on that one- so I tried them out in my crock pot with some classic taco spices to make a faux refried bean recipe. I let the beans, water, spices, chopped onion, and garlic cook in the crock pot for about 6 hours on high. After they were cooked, I drained off some water and got out the immersion blender to get the beans to the right consistency.

IMG_8577
There is no way to take an appetizing photo of refried beans, but it’s amazing! 

This pot made a TON of refried beans, but I was able to freeze the beans in tupperwear and pull them out every week to make more burritos. I took the corn tortillas, sprinkled a little bit of cheese, spooned on some refried beans, and rolled them up in pairs of two into single serve tupperwear. I then froze the portioned out bean burritos and pulled them out each day for lunch. When I was packing my lunch I also put in 2 tablespoons of the medium salsa and poured overtop the burritos when reheating at work.

Served with some plantain chips and carrots, this was the perfect lunch!

Recipe:

2 cups dried white beans

1/2 yellow onion chopped

3 cloves garlic, minced

1/2 tbsp cumin

1/2 tbsp chili powder

1 tsp black pepper

1 tsp kosher salt

6 cups of water

Rinse beans in cool water, remove bad beans, and dump into crock pot. Chop onion and garlic and add to the slow cooker along with spices. Pour in the water and stir to mix. Cook on low for 6 hours.

After cooking, drain about 3/4 of the water remaining. Mash beans with immersion blender until they are the consistency you desire and serve (or freeze or make burritos!).

Pecan Pralines

I made these sweet treats for a coworkers birthday.IMG_8528.jpg 
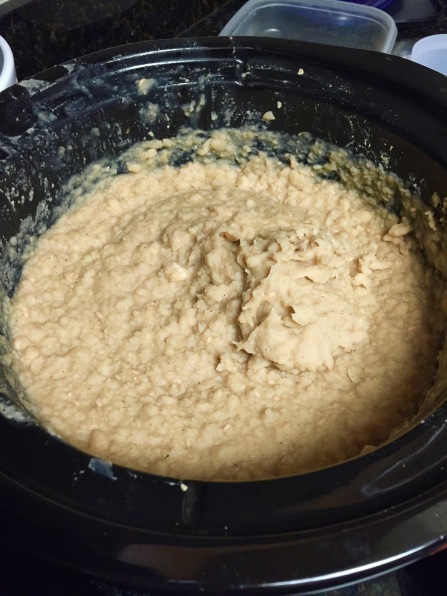
It was my first time making any kind of candy. I modified a friend’s recipe to make it dairy free, but then had to do some extra work to get it mixed and hot enough to solidify into candy.

The good news is that if you start to spoon them out onto parchment paper and realize that they aren’t going to firm up like you expect, you can just throw them back into the pot and continue to heat and stir them until they are hot enough.

IMG_8532.jpg

I learned the secret was when the mix goes from being clear and fairly transparent to looking milky. For me that was after 15 initial minutes in the microwave, and then another 5 minutes in a pot on the stove, for a total of 20 easy minutes for amazing pralines!

IMG_8537.jpg

Recipe: (makes 2-3 dozen)

1 can coconut milk

3 cups of light brown sugar

2 Tbsp butter

2 cups chopped pecans

1 tsp. vanilla

Mix brown sugar and coconut milk in a large microwaveable bowl and place in the microwave for 9-15 minutes, depending on your microwave.

While mixture is cooking, spread newspapers over the counter and cover with wax or parchment paper.

When mixture is out of the microwave, dump into a pot on the stove on high. Add butter and stir until melted. Add in the pecans and vanilla, and stir to continue warming until the liquid changes from transparent and mostly a clear brown liquid to milky and looking more like icing.

Spoon out mixture onto wax paper and cool. You will know instantly if the mixture is going to firm up or continue to run. If it continues to run, just spoon it back into the pot and keep stirring the mixture until it almost sets. Be ready to work quickly to spoon them all out before the pan sets. But it is okay to continue to warm the pan to loosen the pralines back up if needed!

Granola

I have been completing an epic pantry/freezer clean out- hence the lack of creative dinner posts because I have been eating the same soups out of my freezer on repeat for weeks! In my effort to clean out my cabinets, I found a giant bag of Bob’s Red Mill oatmeal and then an entire unopened 2 pound bag of Trader Joe’s gluten free oatmeal. Needless to say, it was time to get creative with the oatmeal options.

I have made oatmeal for lunch, put it into cookies, had it in smoothies, made it into flour for a batter and I still have an abundance left. This week I decided to make granola with it and some other odds and ins I had left and take that with yogurt for lunch!

Granola

I like this granola because it isn’t very sweet. I think the taste of yogurt and sweet granola, while delicious, doesn’t feel like I am eating something substantive and then I end up just wanting more dessert. So I didn’t add any sugar to the mix. I used applesauce and maple syrup to sweeten the granola, although you could also use honey and agave nectar if you have that on hand instead.

A major tip is to not leave the granola in the oven too long. I thought in one of my first batches that longer would make it crispier. Turns out it didn’t get any crispier at 40 minutes than it was at 30 minutes, it just had a slightly burnt taste to it. So avoid that and don’t cook it for too long!

Granola3

IMG_8518.jpg

Recipe:

3 cups gluten free rolled oats

1 tsp cinnamon

1/4 tsp salt

1/4 cup maple syrup

1/2 cup applesauce

1 cup walnuts

1/2 cup raisins

Preheat your oven to 325 degrees. Mix all of the ingredients in a large bowl until fully coated. Line a pan with parchment paper and pour granola onto pan. Put in the oven for 30-35 minutes total, pulling it out every 10 minutes to mix.

Veggie Spring Rolls

When planning to cook dinner for a few friends, I look for ideas that are cheap to purchase, simple to make, but look incredible. That’s where I ended up making these veggie spring rolls. I wanted to make a stirfry for the dinner, but that didn’t quite seem like enough. The meal needed a side, but I wasn’t sure what that would be. I searched my cabinets for ideas and found some spring roll wrappers and decided to go for it.

Veggie Spring Rolls3

I chopped up a little bit of each of my favorite veggies: celery, carrots, green and red peppers, and of course avocado, which I know is technically a fruit. The key to making a good spring roll is including a variety of ingredients. However, the ingredients must include at least one thing that is crunchy and one thing that is soft or otherwise the roll just seems off. I tried this recipe without the avocado and it wasn’t the same. It needed the soft avocado to anchor the roll.

Veggie Spring Rolls
After I chopped the veggies, I topped the avocado pieces with about a teaspoon of roasted red pepper hummus to add some sauce to the roll. I then soaked the rice wrapper in warm water for 10 seconds (or until flimsy) on each side and then laid it on a tea towel. While on the tea towel, I topped it with one piece of the celery, carrot, and peppers, then added the avocado and then did another layer of each of the veggies- making an avocado sandwich if you will. I then wrapped the veggies like a burrito and set aside.
Veggie Spring Rolls2

To serve the spring rolls, I put two on a plate and added a dipping tray of gluten free, low sodium soy sauce. They were a huge hit! I have since served them as a side to fried rice and pho! It was a good combination with both!

Veggie Spring Rolls1


Recipe:

makes 2 spring rolls

two carrots, chopped in half

a stalk of celery, chopped in half, and then those halves sliced hot-dog style (apologies for the elementary school reference!)

4 strips of red pepper

4 strips of green pepper

two slices of avocado

2 tsp of hummus

2 rice paper wrappers

optional: soy sauce

Chop all ingredients and separate on an easy to reach surface.  Top each of the avocado pieces with a teaspoon of hummus.

In a pan, add water up to one inch. Soak the rice wrapper in the warm water for 10 seconds (or until flimsy) on each side and then lay it on a tea towel. While on the tea towel, add the vegetables. Then roll the veggies up like a burrito, folding over the side that would run parallel to the veggies, tucking in the two other sides, and then rolling until compact.

Lentil Taco Bowls

Anyone who knows me knows that I am a HUGE fan of any form of Mexican food! Tacos, guacamole, tacos, quesadillas, you name it- I love it! I am also on a search to continue trying new foods that I have never made before. When I make new foods, I like to try them in a recipe where the rest of the foods are things that I like. Childish and safe? Probably so. But it works!

On my first attempt at making lentils I thought I would make them as a filling for tacos. I boiled the lentils and they were surprisingly easy to make! I just seasoned the lentils like regular tacos, and they were the perfect filler for tacos!

I used the leftovers to make a delicious taco bowl, putting the lentils on the bottom, and then topping with black beans, peppers, salsa, and guacamole. They were also great scooped up in a few chips! Moral of the story: you can use these seasoned lentils to make any of your Mexican food favorites!

IMG_9637

Recipe:

1/2 cup lentils, rinsed

2 cups water

1 tsp chili powder

1 tsp cumin

1 tsp garlic powder

1/2 tsp onion powder

Pour the lentils and water into a small pot. Bring the mixture to a boil, and then lower to a simmer. Add the spices and then cook, uncovered for about 20-30 minutes,stirring occasionally.

Around 20 minutes, all of my water had evaporated, but my lentils were not done. So I added another half cup of water and let it continue simmering for another 10 minutes.

Serve them however you would  regular taco meat!